How to change the logo in the CMS panel?
In this short tutorial, I will show you step-by-step how to change your own logo for your CMS panel. It's a simple way to personalize your content and give it a more professional look.
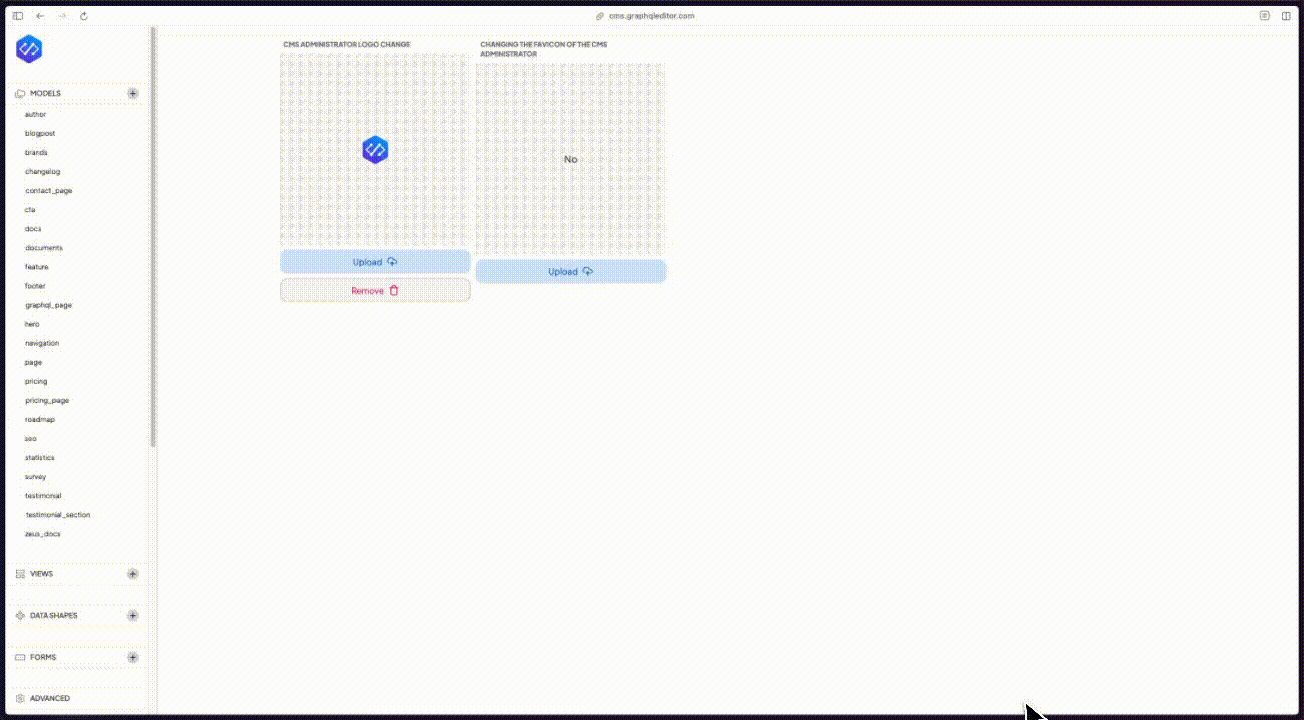
Step 1: Go to the Visualizations section
We start by going to the Visualizations tab in your tool. There you will find all the options for editing your visualizations.
Step 2: Select a logo
Next, you need to choose the right logo file to add. You can choose a smaller, slicker logo that will look better in your work.
Step 3: Add the logo to the visualization
Once you select the logo file, it will be automatically added to the visualization. You can see the end result right away.
This simple process will make your visualizations look more professional and unique. If you want an even better effect, choose a logo in high resolution and in a suitable format (e.g. PNG with transparency). Good luck!